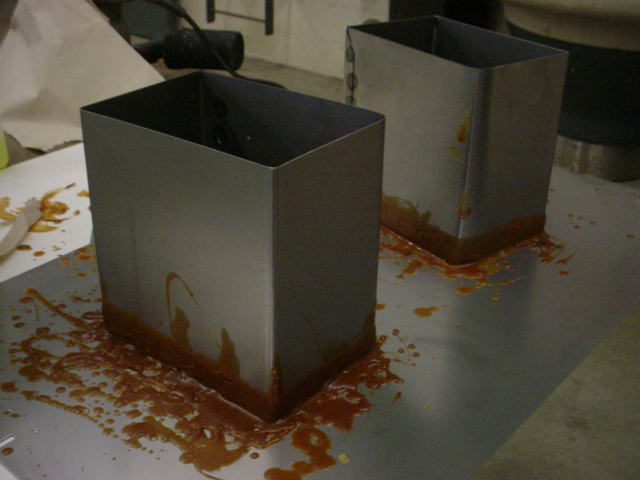
I built a wall of clay around the bottom of the coffee mugs to hold rubber. Yes!
I have time to make a rubber mold this time!! I didn't have time for this step before
the homecoming game. Back then, I put the original pattern right into the investment
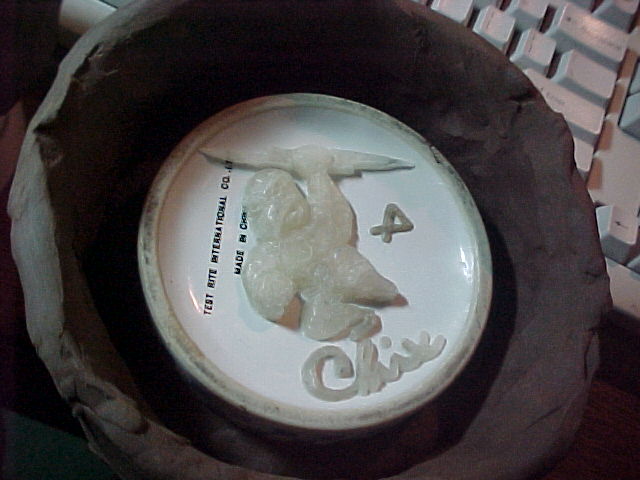
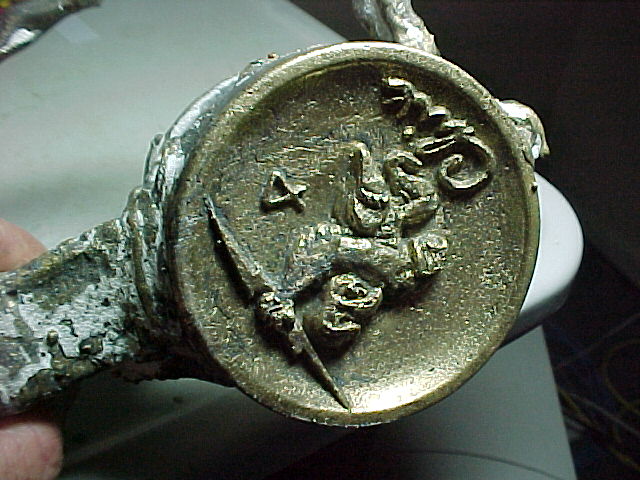
mud and hoped the first one worked - which it didn't. When people ask what the mark
under the chick's armpit is, I say, "It's an enigma". I've found that sometimes
that answer suffices. In fact, it's my personal mark. That's the first, and distinguishing,
letter in my signature.
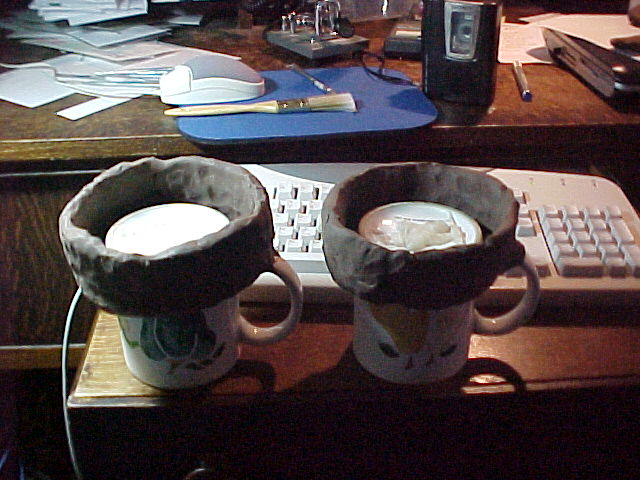
So, here are the two new patterns, ready for rubber.
I haven't used the rubber in over a year, and the rubber I have is three years
old. I've taken care of it, but I was uncertain about its quality. I also pretty
much forgot the procedure, too. I would spray a coating of release agent on the
pattern first. That might cause problems if it's too deep or not deep enough. I
decided to try the process on a scrap pattern, in order to test things. I didn't
want to risk my new originals yet. As it happened, things went real smooth, (figures,
right?) So, one day later (that's how long it takes for the rubber to set up) I
bathed my new patterns in rubber.
Here they are, all smothered in rubber. This is after they've been setting overnight
in the spare room - at 65 degrees. They are already set up, in this picture. Here,
I am about to open them up for a look.
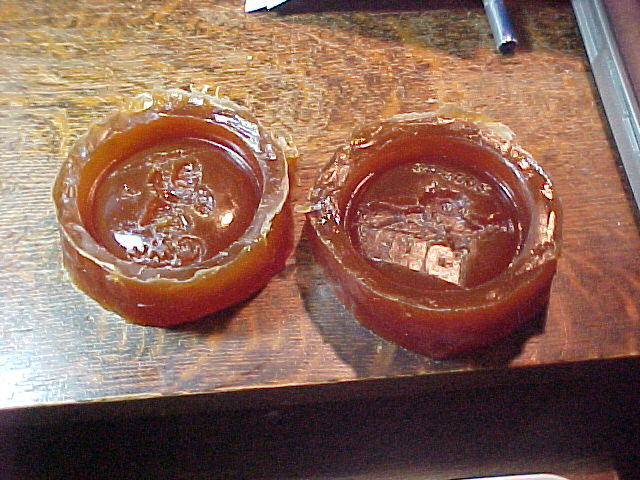
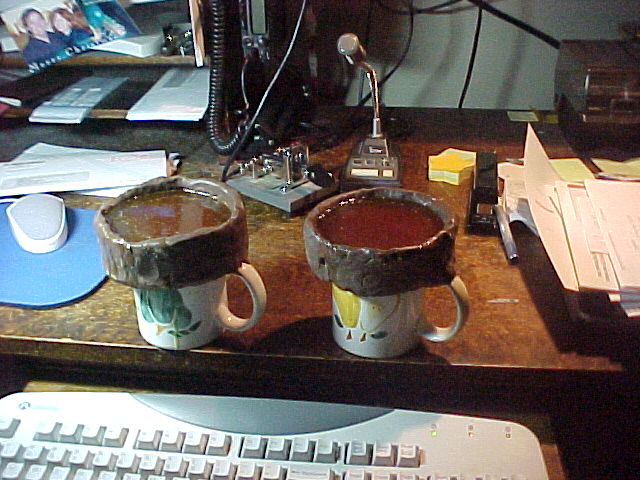
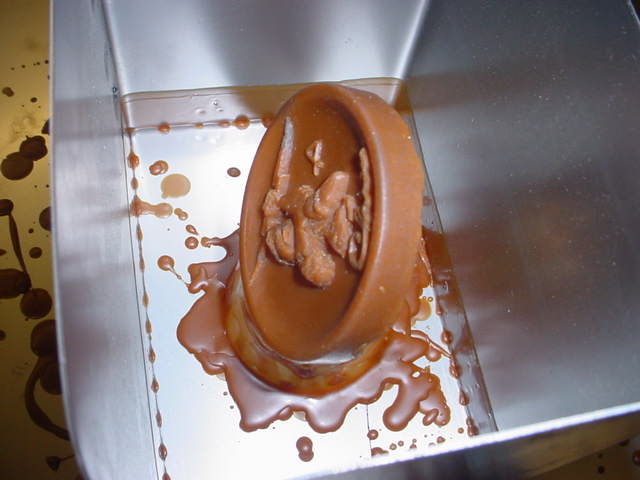
This is what I found. It's hard to tell if it's good or bad, by looking. The only
way to find out for sure is to pour some hot wax in there and let it set up. That
doesn't take long at all.
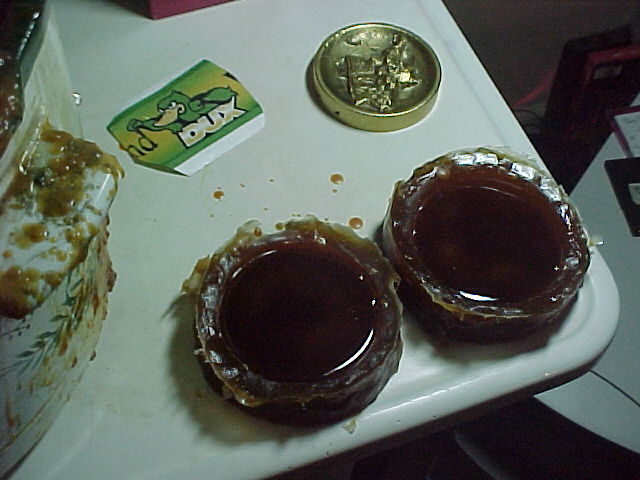
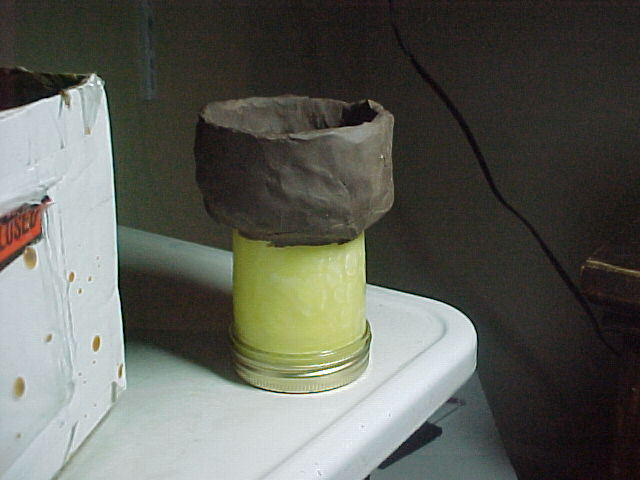
Here's the hot foundry wax. I cooked it up in the garage, then brought the crock
pot inside and spooned out the wax. I like the way it smells. My old, unacceptable
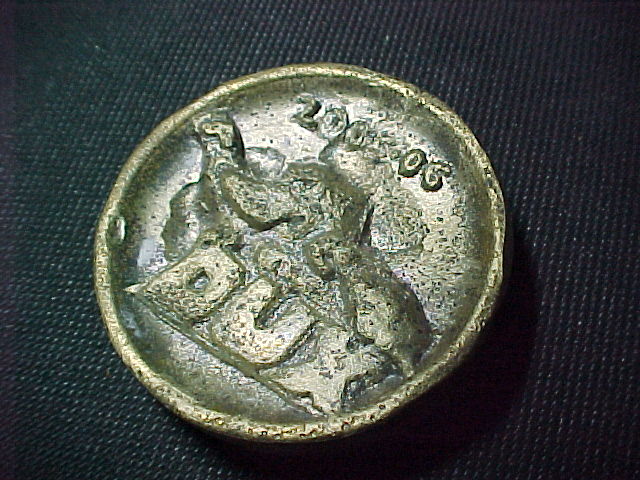
coin is there on the table, too.
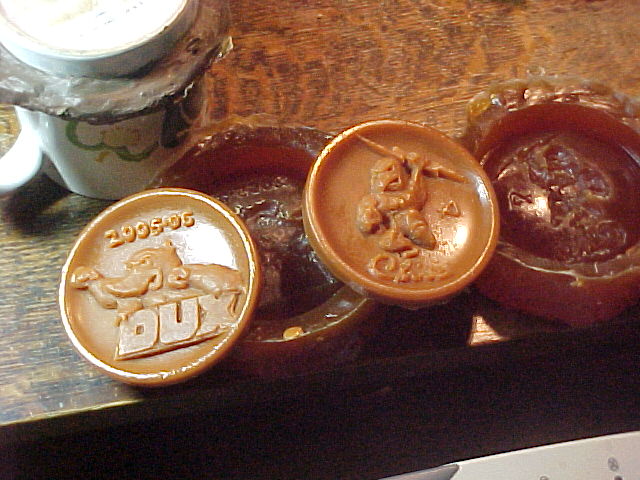
Here's what I found. I am very pleased. The dark and light spots you see in the
chick background are only from the film of mold release that was left over from
making the rubber mold. It wipes right off. I only have a very little reworking
to do on these patterns. Then, I'll stick them together and put them in the investment.
Since I have a rubber mold now, I can turn these things out by the hundreds! And,
my original patterns are still as good as new. I'm happy.
(time passes)
Coin Project - (even more)
Well, I was optimistic, but I had nothing but trouble when it came to casting.

These are just some of the rejects. I have more at home and in the car. I started
out casting two at a time - a Chick and a Duck. But after a few bad ones, I started
doing one at a time.
Early on, I suspected the real problem was that I was pouring them "open faced".
That was different from anything I'd done before or seen in books. It seemed possible
that I needed to bury the pattern in the mold and pour through a spru. The metal
in the spru, above, would add pressure in the mold.
This casting is not typical in that several turned out better. But this one clearly
shows the trouble I had with all of them. The distortion is worse in the low parts
of the background. In the mold, these would be the high spots that the hot metal
laid over. I suspected that, rather than moisture expanding into the metal, hot
air or some gas from the investment was the problem.
This one looked different. I suspected that the smaller voids in the background
were from slag. Maybe I didn't skim well enough. The dent at my pinky is from the
welder. I was practicing and learned to be more careful. The dark color is from
the stainless steel brush.
This one turned out just fine (The only distortion is to the knee above the "C".).
I still don't know why. I tried to get others to turn out like this. I called the
people who supply the investment and asked them. I called a real art sculptor. I
read books and articles on the Internet. I tried hot metal, cool metal, hot molds,
cool molds, and every combination.

I decided to attach sprus and bury the patterns. This is a hurry-up job to make
sprus.
I also sent the guys at Ransom & Randolph (investment supplier) some wax patterns.
They agreed to try casting some, after my desperate plea.
We only had three weeks of school left.
With this one, I went so far as to attach a vent, so that the air could escape from
the bottom instead of having to bubble through the metal.
I suspended the pattern and spru on heavy wire. This was awkward.
The patterns wanted to float out of the investment. I had to weight them down with
steel, being careful that they didn't rotate away and tough the side of the flasks.
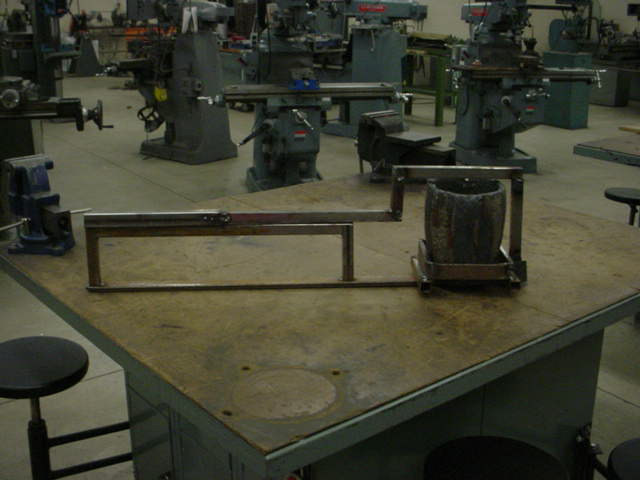
I needed more metal than what I could ladle, so I welded up a way to hold a small
crucible.
This is the result. It's an improvement, but there are still defects in the background.
The defects are small, but unacceptable.
I thought of flawless castings in the world around me and wondered, how in the heck
do they do it?
The guys at R&R sent me a couple nice castings and pictures of how they did
it. Although they had told me on the phone that pouring "open faced" was not suspect,
they did make and used sprus. I called them and asked what the picture above showed.
His answer, "A vacuum table". ! !!!
A what? !!!
He said, that to be save, they used their vacuum table to draw air out of the mold
while the metal was poured in. Of course!
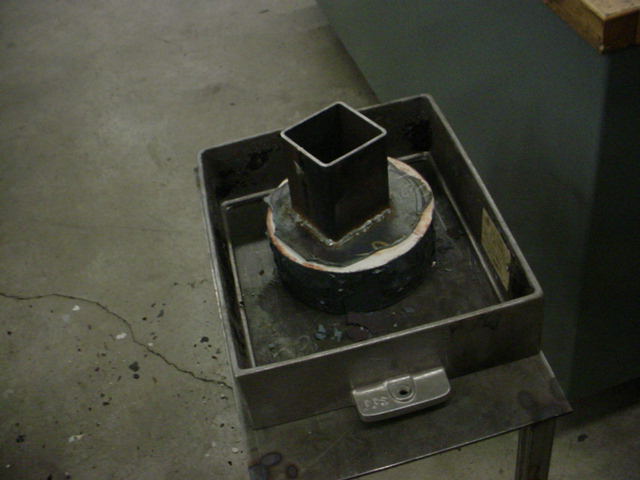
I made up some more molds, but ran out of investment. Above, you can see that gating
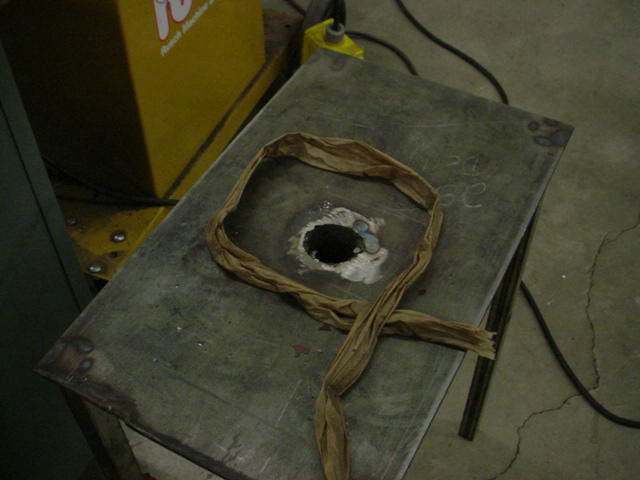
system is exposed and I didn't reach the top of the flask - no spru.
I welded up this spru and placed in on top of the investment. I would pack sand
around it.
Here it is, ready to pour.
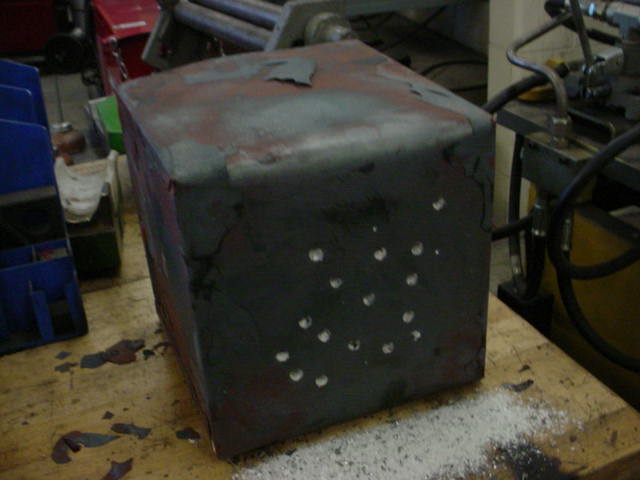
I drilled holes in the bottom, to suck air through.
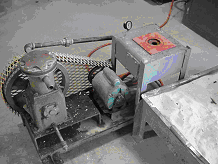
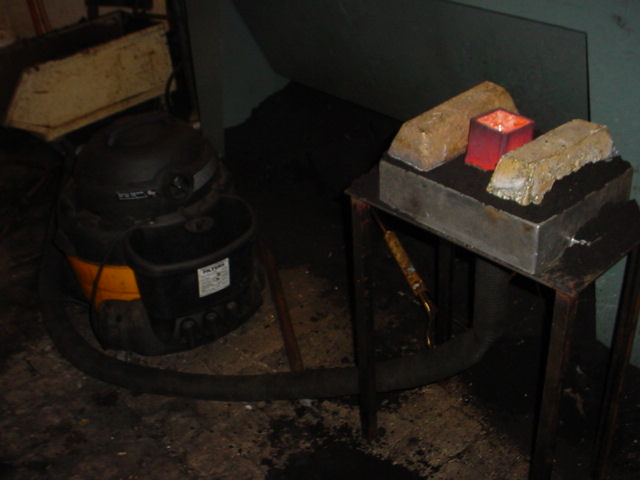
This is the hurry-up job vacuum table. A student, Brett Tiggelman, threw this together
for me. We had two weeks of school left.
It's hard to see, but I hooked a shop vac to the table and turned it on. The hose
collapsed, but I decided to go with it anyway.
I also had some old molds left over, with no sprus. I was waiting for delivery of
more investment, so I decided to cobble sprus above the best looking one. I put
it in a sand flask.
Then I put another welded up spru on top and covered with sand.
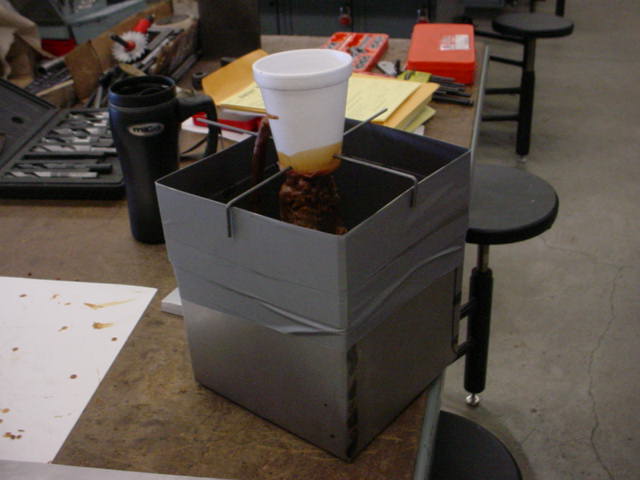
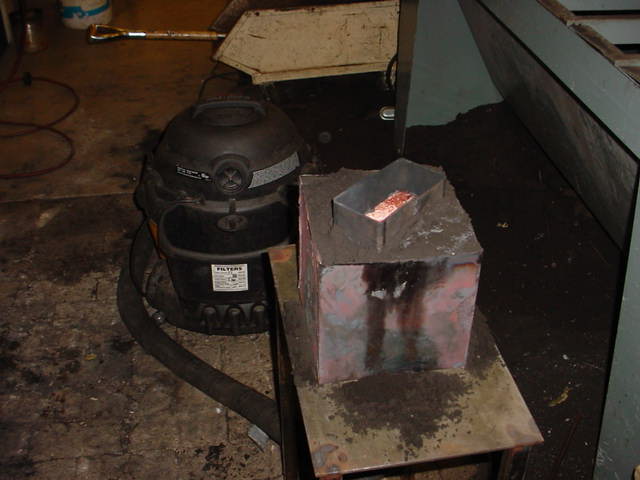
Here it is on the table, with hot metal in place. The ingots are to weight down
the cobbled spru. Brass is heavy. I could imagine it floating the lid off and leaking
all over.
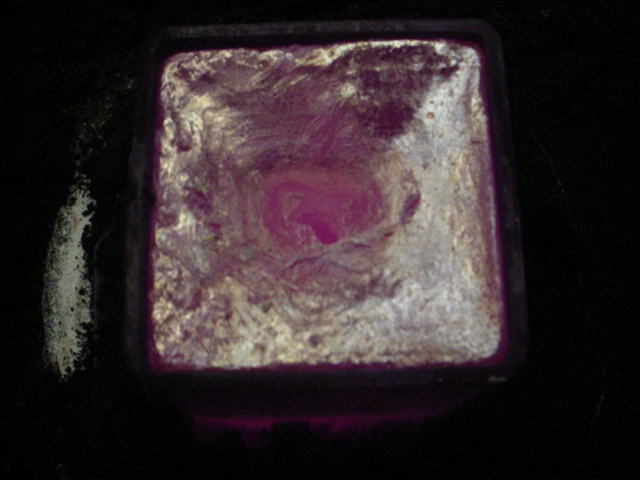
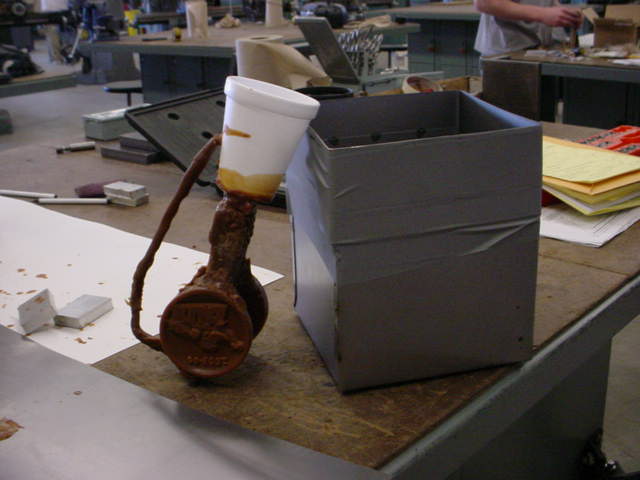
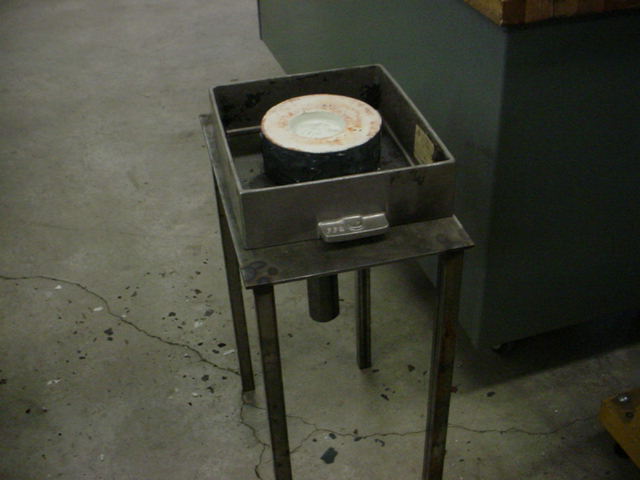
This is what happens when real thick metal freezes and cools. It shrinks. A little
tunnel formed that reached all the way down. It didn't cause any problems.

Getting the brass out of the steel spru wasn't easy.
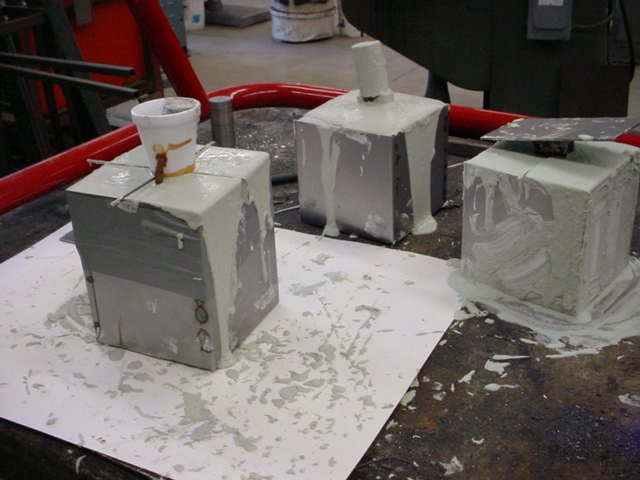
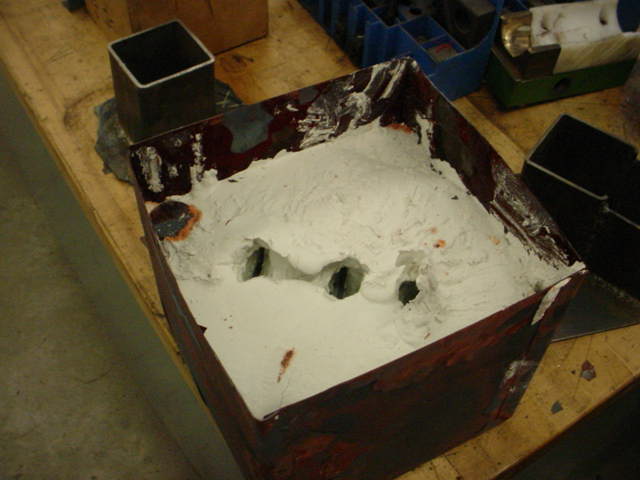
When the new investment arrived, I had time to make a couple more molds. (One week
of school left.) You can see that I've learned to leave the bottom off the flask,
and to simplify the spru.
This is also real smart. Rather than suspend the patterns, I stuck them to the steel
sheet underneath. I also filled the crack with wax, to keep the investment from
leaking out.
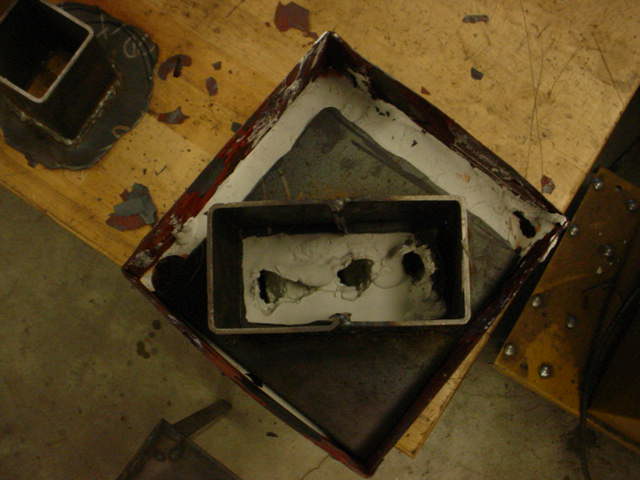
This is what it looked like. (The wax only sticks real good if you clean the steel
with a solvent. Otherwise, it breaks off and the pattern floats up into the investment.
I learned that earlier.)
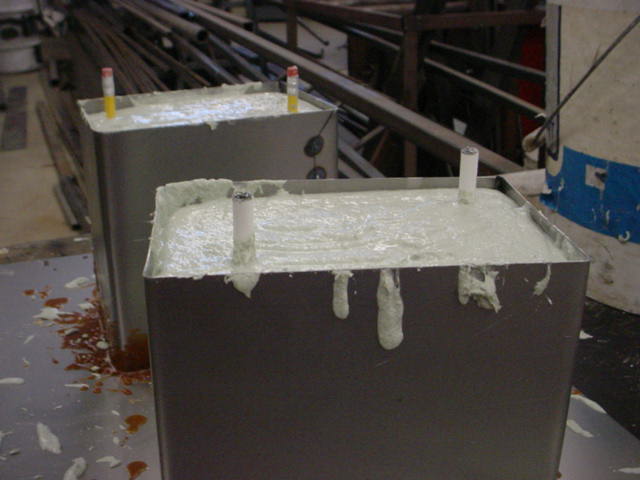
I wanted to add vents, to help suck the air out, but forgot to make wax vents. I
stuck pencils in one mold and pens in the other. (I ran out of pencils.) I was able
to pull the pens out afterwards, but the pencils broke. They burned out in the kiln,
except for the lead. I left the investment below the "top", so that it wouldn't
rest on the vacuum table when I turned them over.
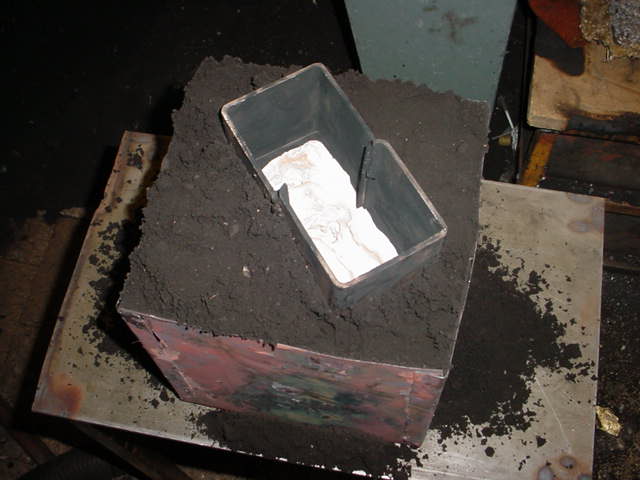
This is what they looked like before going into the kiln.
This is the result. They look fine, except for this discoloration and small texture
defect. I was able to clean this off easily with a wire wheel.
The same discoloration and texture covers the casting. I think it might be avoided
with cooler metal. I'm not sure.
This one also has a couple beads, where bubbles in the investment stuck to the wax,
(bottom and thumb). Those came right off with a chisel.
This is the first hurry-up job of welding and machining, along with the castings
from R&R that I machined. This is the last day of school. I got this done at
6 pm. I handed it off to our superintendent at the 6:30 pm farewell meeting.
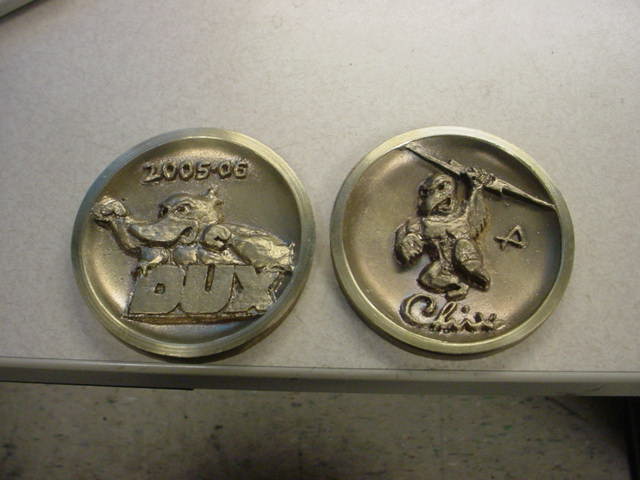
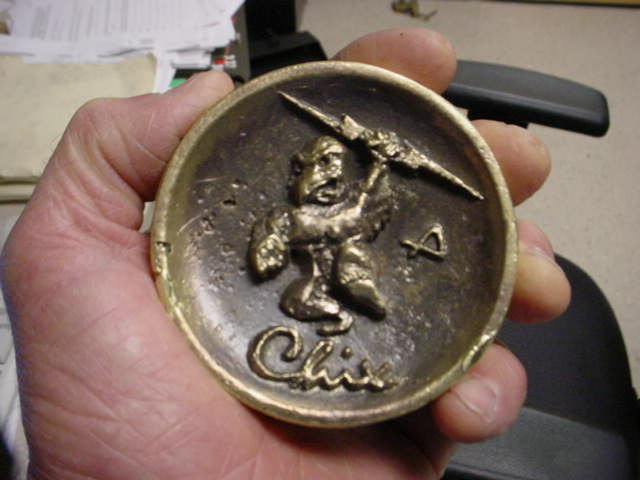
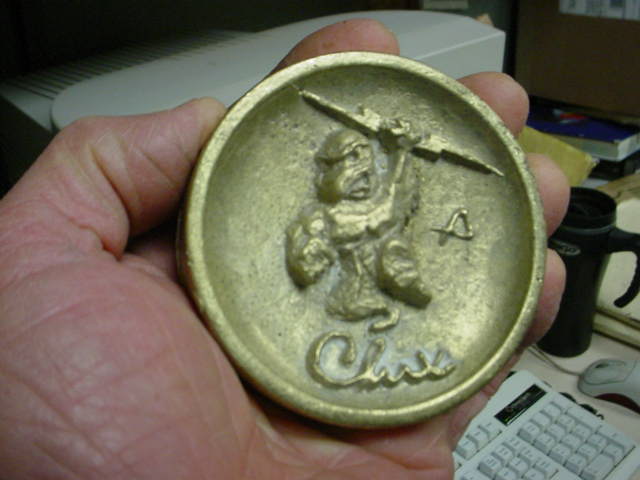
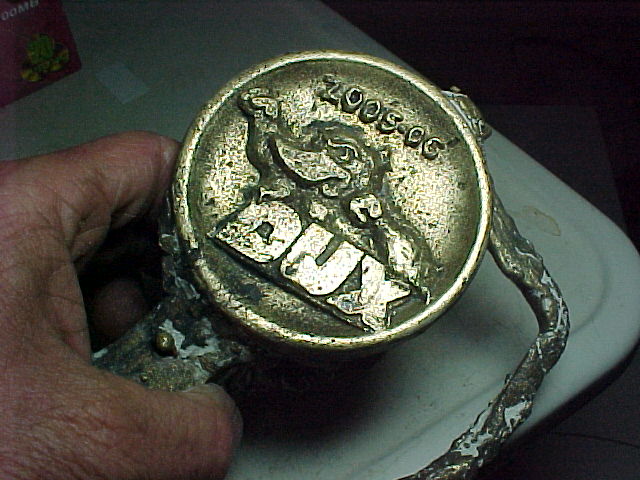
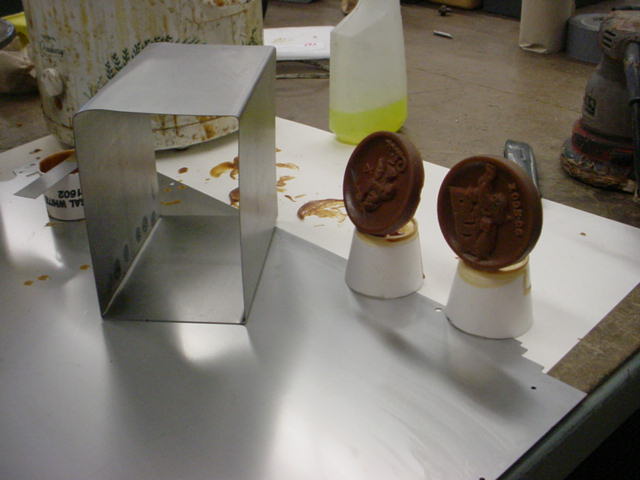
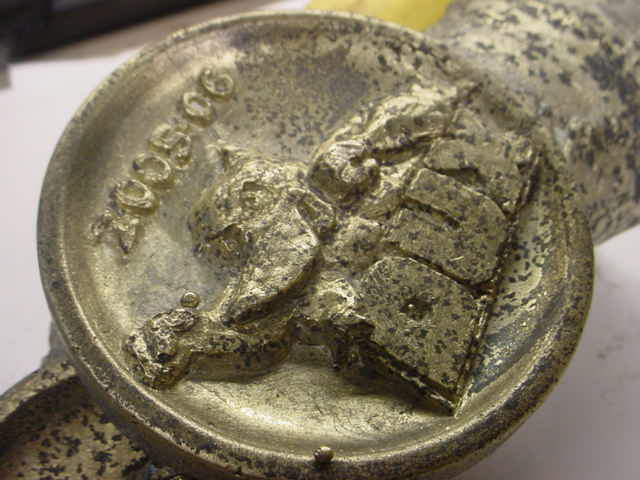
These are the R&R castings that I machined. They are bronze.
I used brass. I sand blasted mine, to clean it. Then machined it.
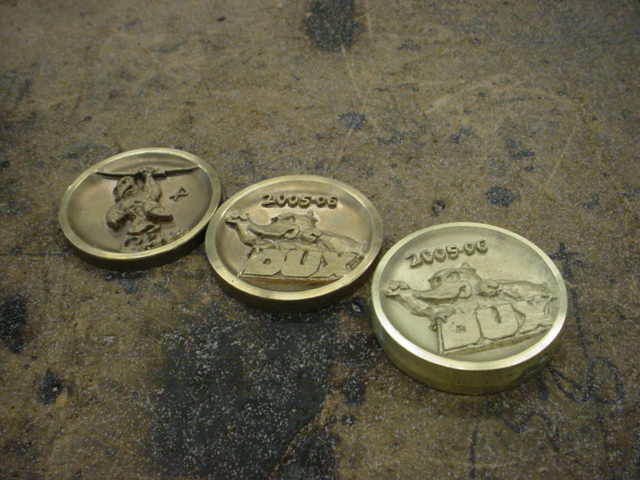
Here they are again. I came back during the summer to weld and machine two more
of these coins. I gave them to the principals at our two high schools. I'll hand
the bronze castings to our superintendent to go in a display.
Back